 Tyne Seedling
You will discover how to recreate winter soil conditions inside your kitchen refrigerator using coarse sand. Breaking seed dormancy deliberately ensures high, uniform germination across wild alpine strawberries and brambles.
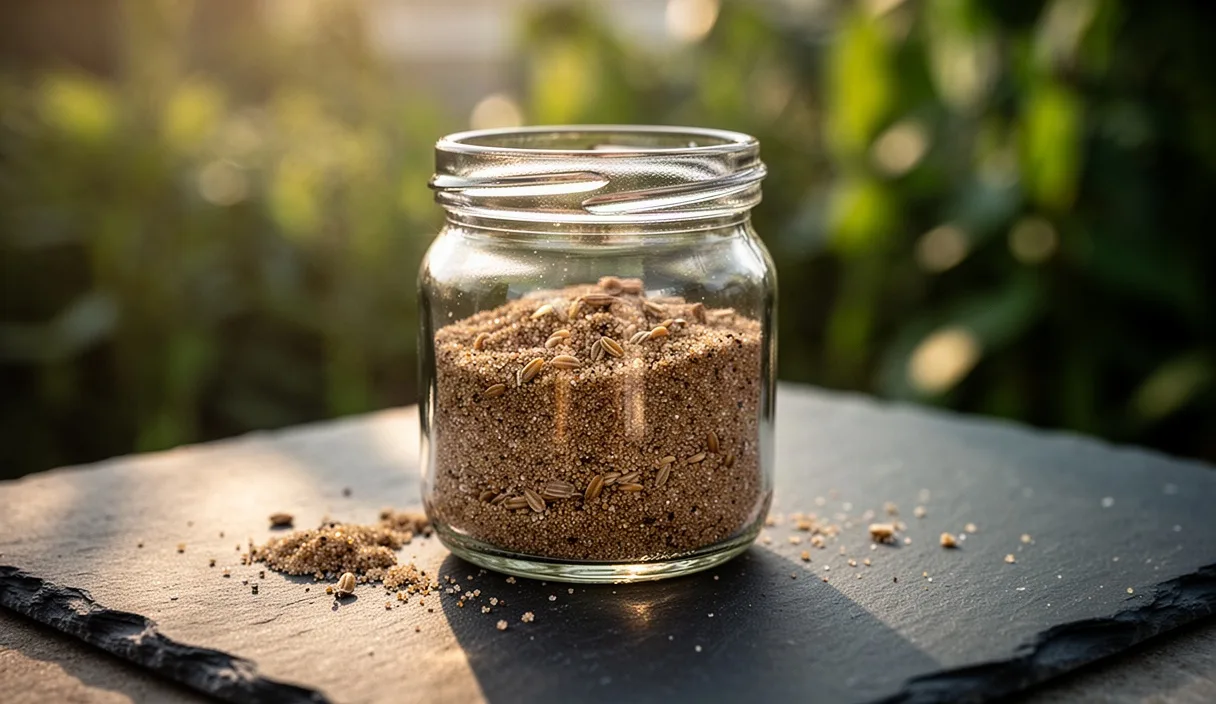
- Mix tiny berry seeds with damp horticultural sand until it clumps together without dripping water.
- Seal the sand mixture in an airtight glass jar and refrigerate for four to eight weeks.
- Sow directly on a fine seedbed immediately after chilling without allowing seeds to dry out.
When the late autumn frost hardens the topsoil outside our workshop, our seed work moves indoors to the wash sink and the cold room. Perennial berry seeds carry the memory of the ground they fell on. Unlike tender summer annuals that spring to life with a splash of warm water, wild blackberries, currants, elderberries, and native blueberries demand proof that winter has truly passed. They hold their embryos behind stubborn coats, bound by chemical inhibitors that yield only to months of steady, damp cold. Working with them requires patience, clean hands, and an understanding of physical materials.
In our nursery, we practice cold moist stratification not as an abstract laboratory chore, but as a deliberate craft. We clean the pulp, mix the mineral aggregates, calibrate the water, and stow the packed jars away in the dark. Stratification bridges the quiet months between autumn seed collection and early spring germination. By managing the exact conditions inside glass jars, we recreate the snowbound leaf litter of the woodland floor, protecting the seed from rotting while preparing the dormant life within to wake on schedule.
The Chemistry of Natural Winter Seed Dormancy
A perennial berry seed is a biological survival capsule. Inside its protective hull, the plant maintains high concentrations of abscisic acid, a hormone that halts cell division and blocks the metabolic machinery needed for growth. This chemical safeguard ensures that a raspberry or rose seed shed in August does not sprout during a warm week in October, only to be killed by the first hard freeze of November. The seed waits for a sustained period of low temperatures, hovering between 1 and 4 degrees Celsius, to dismantle this barrier.
During cold, damp conditions, water slowly penetrates the outer coat through microscopic fissures, activating hydrolytic enzymes. Over eight to sixteen weeks, these enzymes gradually metabolize and break down the abscisic acid. In its place, the embryo begins synthesizing gibberellins, the growth hormones that stimulate protein synthesis and loosen cell walls. Only when the internal ratio shifts in favor of gibberellins can the radicle, or embryonic root, push through the softened seed coat.
Natural dormancy also involves the seed coat itself, known as the testa. In genera such as Rubus (blackberries and raspberries) and Sambucus (elderberries), the coat is dense and semi-impermeable. Microorganisms in the surrounding soil slowly etch the coat over the winter, weakening it so moisture and oxygen can reach the embryo. When we stratify seeds manually, we replicate this mechanical breakdown through cleaning and prolonged contact with damp, coarse minerals, ensuring that chemical inhibitors wash out evenly across the entire seed lot.
Materials: Coarse Sand, Glass Jars, and Clean Water
We avoid peat pellets and plastic zip bags whenever possible. Peat can harbor fungal spores that thrive in cold, closed spaces, and thin plastic bags compress under shifting containers, squeezing seeds together and cutting off oxygen. Instead, we rely on three clean, durable materials: sharp horticultural sand, small glass preserving jars, and non-chlorinated water.
The choice of aggregate sets the foundation for healthy stratification. We use sharp, coarse silica sand with a grain size between 0.5 mm and 1.5 mm, commonly sold as horticultural grit or coarse builder's sand. Do not use fine play sand; fine sand packs tight when wet, forming a dense cake that suffocates dormant seeds. Sharp sand has irregular, faceted edges that leave tiny air pockets between grains, maintaining a constant supply of oxygen around each seed coat while holding an even film of moisture.
- Coarse silica sand: Washed twice in fresh water to remove fine silt and dust, then drained.
- Glass jars: Standard 120 ml to 250 ml wide-mouth canning jars with two-piece metal lids. Glass allows visual inspection without opening the container.
- Clean water: Rainwater, well water, or boiled tap water that has cooled to room temperature. Chlorinated tap water straight from the main can damage tender embryos, so we let it sit in an open bucket overnight to dissipate treatment gases.
- Pulp-cleaning sieves: Fine stainless-steel kitchen mesh for separating berry flesh from tiny seeds before chilling.
Before packing, clean your jars and metal bands thoroughly with hot, soapy water, rinse them clean, and allow them to air dry on a rack. Sterilization in a pressure cooker is rarely necessary, but basic cleanliness prevents aggressive surface molds from establishing themselves before the seeds have a chance to cycle through their rest.
Moisture Calibration: Squeezing Sand Without Dripping
Balancing water content is the most delicate physical action in cold stratification. Too dry, and the seed remains suspended in chemical dormancy without ever breaking down abscisic acid. Too wet, and the air spaces within the sand flood, driving out oxygen and causing the seed to ferment, rot, or succumb to gray mold. We aim for field capacity: the maximum moisture the medium can retain against the pull of gravity without becoming waterlogged.
To calibrate the mix, we rely on a tactile squeeze test developed through years of handling soils:
- Place three cups of washed, coarse sand into a clean mixing bowl.
- Pour in fresh water a tablespoon at a time, turning the sand with a flat trowel until every grain changes color to a deep, dark wetness.
- Reach into the bowl and scoop up a generous handful of the mixture.
- Squeeze your fingers closed as hard as possible, compressing the sand into a tight ball inside your palm.
- Look closely at the gaps between your knuckles. A sheen of moisture should rise to the surface, glistening against the skin, but not a single heavy drop of water should fall from your hand.
If water drips between your fingers, the medium is oversaturated. Add dry, clean sand by the half-cup, mix thoroughly, and repeat the squeeze test. If the ball collapses into loose, powdery grains the moment you open your palm, the sand is too dry; mist the bowl with clean water and mix again. Once calibrated, combine three parts of this damp sand with one part cleaned berry seeds, ensuring the seeds sit distributed throughout the aggregate rather than clustered against each other.
Labeling Chilling Durations for Berry Varieties
Every berry species follows its own seasonal calendar. A northern highbush blueberry requires far fewer chill hours than an elderberry or a hawthorn. We set our storage refrigerator to hold between 1.5 and 3.5 degrees Celsius. Avoid storing seed jars in the crisper drawer alongside apples or pears, as ripening fruit releases ethylene gas, which can interfere with dormant embryos or trigger abnormal growth.
Write labels directly on the glass using a wax grease pencil or a waterproof paint marker. Tape labels can loosen in the high humidity of a cold storage cabinet. Every label must carry three pieces of information: the species name, the date the jar entered cold storage, and the target extraction date.
| Berry Variety | Required Chilling Duration | Target Temperature Range | Notes on Seed Preparation |
|---|---|---|---|
| Alpine Strawberry (Fragaria vesca) | 21 to 30 days | 2 to 4 degrees C | Very fine seed; surface mix with sand lightly. |
| Highbush Blueberry (Vaccinium corymbosum) | 60 to 90 days | 1 to 3 degrees C | Rinse thoroughly to remove fruit sugars. |
| Blackcurrant (Ribes nigrum) | 90 to 110 days | 1 to 4 degrees C | Hard coat; benefits from 24-hour room soak first. |
| Red Raspberry (Rubus idaeus) | 90 to 120 days | 1 to 3 degrees C | Tough inner stone; requires steady moisture. |
| American Elderberry (Sambucus canadensis) | 120 to 150 days | 1 to 4 degrees C | Often benefits from 60 days warm then 90 cold. |
When working with wild-gathered selections, we always lean toward the longer chilling duration. An extra two weeks in cold sand rarely harms a dormant berry seed, but removing it forty days too soon guarantees an uneven, frustratingly slow emergence on the germination bench.
Checking for Premature Sprouting in Cold Storage
Cold stratification is not an operation you can set up in November and ignore until April. Jars require checking every fourteen days. We bring each jar out to a clean bench under bright light, wipe the condensation from the outer glass, and inspect the interior without shaking the container.
We look for two distinct events: fungal outbreaks and early radicle emergence. If mold appears as a white, webby film on top of the sand, lift the lid, scrape off the affected layer with a clean spoon, and leave the jar open for ten minutes in a room with gentle air circulation before replacing the lid loosely. Never seal the canning band completely tight; screw it down until it meets resistance, then back it off a quarter turn. This gap allows carbon dioxide to escape and fresh oxygen to diffuse into the pore spaces.
Toward the final three weeks of the scheduled chilling period, inspect the seeds for radicles. A germinating berry seed pushes out a blunt, bright white root tip that contrasts sharply against dark, coarse sand. If more than four or five seeds in a jar begin pushing their roots out while still in cold storage, the chilling cycle is complete, regardless of the calendar date. The seed has exhausted its abscisic acid, and keeping it chilled risks stunting the root tip or twisting the young stem into an unusable spiral. When you see roots, move the jar to the potting bench immediately.
Transferring Chilled Seeds to the Germination Tray
Moving stratified seeds into growing media requires a light touch. The radicles are brittle, and rubbing them against sharp sand can shear off the growing tip, killing the seedling before it lifts its cotyledons. For this reason, we never try to wash or pick the seeds out of the sand matrix. Instead, we sow the mixture of seed and sand together directly onto the surface of our nursery flats.
We blend our germination medium with equal parts screened leaf mold, fine horticultural vermiculite, and aged pine bark fines. Fill a sturdy wooden flat or shallow seed tray to within 10 mm of the rim, tap the flat flat against the bench to settle air pockets, and press the surface level using a smooth wooden tamping board. The soil surface should be firm, flat, and free of large debris.
- Sowing the slurry: Tip the sand and seed mixture out of the glass jar into a wide, shallow bowl. Scatter the aggregate across the flat in a thin, uniform dusting, ensuring the sand grains sit in a single, sparse layer.
- Covering depth: Berry seeds are small and frequently need light cues to complete germination. Sift a mere 2 mm layer of fine horticultural grit or washed sand over the top. This anchors the seed without blocking daylight.
- Hydration: Never water newly sown berry flats from above with a heavy watering can, which dislodges fine seeds and buries them too deep. Place the flat in a shallow water tray and allow moisture to draw up from the base through capillary action until the surface aggregate darkens.
- Temperature transition: Place the tray in an unheated greenhouse or on a bench under lights held at 15 to 18 degrees Celsius. Avoid high bottom heat right away; a sudden blast of warmth can shock chilled perennial seeds back into a secondary dormancy.
Common Stratification Mistakes
Most failures in perennial seed propagation stem from a few predictable missteps during the chilling period. Identifying these issues early can save an entire season of work.
- Using unwashed organic compost in jars: Rich garden soil or potting mix contains high levels of active saprophytic fungi that rot seeds in cold, enclosed containers. Always stick to sterile, inert silica sand or fine vermiculite.
- Freezing the seeds solid: A common misunderstanding equates cold stratification with freezing. Freezing water inside damp, imbibed seeds expands and ruptures cellular membranes, killing the embryo. Keep your refrigerator above 0 degrees Celsius.
- Failure to clean fruit pulp: Berry skins and pulp contain natural chemical germination inhibitors. Seeds must be rubbed across a fine sieve under running water until all sticky sugars and flesh are gone before mixing with sand.
- Screwing jar lids down airtight: Living seeds respire slowly even at cold temperatures. Tight seals cause oxygen starvation and anaerobic conditions, leading to sour, fermenting jars.
Practical Next Steps at the Potting Bench
Before mixing sand and seeds, take an hour to verify your tools and working area. Calibrate your storage thermometer by placing it in a glass of ice water for ten minutes; it should read zero degrees Celsius. Hang this reliable gauge inside your refrigeration unit rather than trusting the manufacturer's built-in dial, which often swings several degrees wide throughout the compressor cycle.
Gather your seed lots, set out your wide-mouth jars, and wash your sand aggregate thoroughly in an outdoor bucket until the wash water pours clear. Settle down at the bench with a notebook, note the collection dates and origins of your stock, and begin the hand mixing with calm deliberation. Taking care with the weight of the water and the grain of the sand during these quiet winter days is the surest way to bring a healthy, uniform stand of berry canes and bushes to life when the spring sun finally warms the greenhouse glass.
Our field notes serve general horticultural education; consult your local agricultural extension service for regional biosecurity rules and persistent plant pathology. Disclaimer

Complementary Reading
-
 Seedcraft & Propagation 9 min read
Bottom-Watering Seed Trays Without Damping-Off Risk
You will learn how to supply water through capillary pull from underneath without flooding fragile stem collars. This approach keeps topsoil dry, discards excess stagnant moisture, and forces roots to grow deep.
-
 Seedcraft & Propagation 9 min read
Pricking Out and Potting Up Tender Tomato Seedlings
You will discover how to read true-leaf development and separate crowded sprouts without bruising main stems. Handling plants strictly by their cotyledons allows you to bury leggy growth and build thick root balls.