 Tyne Seedling
You will learn how to supply water through capillary pull from underneath without flooding fragile stem collars. This approach keeps topsoil dry, discards excess stagnant moisture, and forces roots to grow deep.
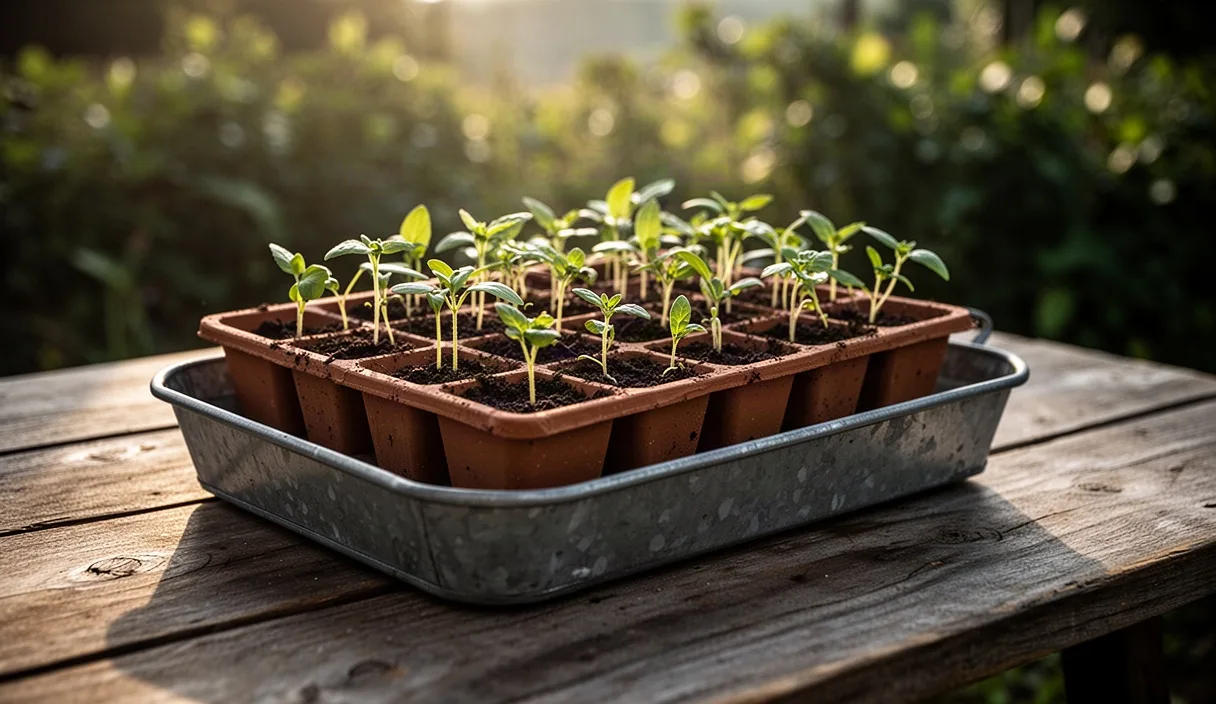
- Submerge seed tray bases for twelve minutes until capillary action moistens the upper millimeter of soil.
- Remove trays to a draining rack promptly so bottom drainage holes do not sit in standing water.
- Keep top dressing dry with coarse sand to deny fungal spores the humidity they need to germinate.
When we work at the potting bench in early spring, our hands move between bags of screened peat, coarse horticultural perlite, and dark, crumbly worm castings. We pack our cell trays with care, leveling the medium with a wooden strike-off stick before dropping seeds into their dimples. Yet the quietest hazard in the nursery waits in the water reservoir beneath those trays. While bottom-watering spares tender stems from overhead droplets, leaving flats to sit in stagnant puddles creates the exact waterlogged, airless environment where damping-off pathogens multiply.
Damping-off is not an isolated condition, but the visible collapse of a young stem caused by water molds such as Pythium and fungi like Rhizoctonia. The damage happens right at the soil line, turning firm green tissue into thread-thin rot within a single morning. By understanding how water climbs through potting media against gravity, and by controlling the duration of that contact, we can hydrate root zones fully while keeping the upper seedbed open to the air.
The Mechanics of Capillary Rise in Plug Cells
Water moves upward through plug cells through capillary action, drawn by adhesive forces between the liquid and the porous walls of the potting media, balanced by the cohesive pull of water molecules on each other. When we submerge the base of a tray, the largest pores at the bottom saturate instantly. The finer pores then pull moisture skyward, lifting water through the root zone column toward the surface. The height and speed of this climb depend directly on the grit, fiber length, and compaction of your potting blend.
A mix made with long-fiber sphagnum peat or coarse coconut coir creates a web of irregular channels. If the blend contains twenty percent perlite by volume, water rises at a steady pace of roughly ten millimeters every four minutes. When a mix contains excessive dust, heavy garden loam, or over-screened compost, the pores become microscopic, drawing water up far too slowly and holding it like a dense sponge. In contrast, an overly loose mix filled with coarse bark chips may lack the capillary continuity needed to pull moisture more than twenty millimeters up the plug.
| Substrate Component | Primary Function in Cell | Capillary Pull Speed | Air-Filled Porosity |
|---|---|---|---|
| Long-fiber blonde peat | Moisture reservoir, structural sponge | Moderate (10 mm / 4 min) | Medium (15 to 18 percent) |
| Coarse perlite (Grade 3) | Capillary break, pore creator | None (free draining) | High (35 to 45 percent) |
| Horticultural vermiculite | Horizontal water distribution | Fast (15 mm / 3 min) | Low to medium |
| Aged pine bark fines (3 mm) | Prevents silt packing | Slow | High (25 to 30 percent) |
When packing cells, the pressure of our thumbs matters as much as the recipe itself. If we press down too hard, we collapse the larger pore spaces, leaving only tiny pores that retain water indefinitely and suffocate root hairs. We aim for a light tap of the tray against the wood bench, allowing gravity to settle the dry mix, followed by a gentle sweep across the top. This leaves open channels where water climbs efficiently, yet allows gravity to drain excess moisture the moment the tray leaves the bath.
Setting the Optimal Water Depth and Immersion Time
To bottom-water without drenching the crown of the seedling, we use a wide, shallow reservoir such as a standard heavy-gauge flood flat without drainage holes. We fill this basin with tepid water to a depth between twelve and eighteen millimeters. Using cold water straight from an outdoor spigot shocks young root systems and slows down cell respiration, while warm water encourages dormant bacterial growth. We aim for ambient room temperature, roughly eighteen to twenty-one degrees Celsius.
We lower the seeded plug tray straight down into the water, ensuring it rests level. Timing the soak requires close observation rather than walking away. In a seventy-two cell tray measuring forty millimeters in plug depth, water requires approximately twelve to sixteen minutes to saturate the lower two-thirds of the plug. We do not wait for the very top of the compost to turn dark and muddy; doing so means the entire root core is thoroughly flooded.
- Level the soak pan: Set your catch tray on a flat, solid surface so water distributes evenly across every drainage hole.
- Measure the fill depth: Pour in clean water until it reaches halfway up the height of your cell taper, usually fifteen millimeters.
- Float the tray down: Lower your plug flat steadily to avoid trapping air pockets beneath the drainage holes.
- Watch the moisture tide: Check the side plugs every three minutes. You will see a dark line of moisture creeping up the soil wall.
- Lift before the crown darkens: Remove the tray when the moisture front rests roughly five millimeters below the surface of the soil.
Once lifted, the internal capillary draw continues for several minutes. That upper dry zone will pull just enough moisture from below to dampen the seed coat without turning the surrounding particles into a wet paste. This controlled deficit keeps the soil surface aerated while satisfying the roots below.
Why Surface Moisture Invites Fungal Spores
Fungal spores belonging to Pythium ultimum and Rhizoctonia solani exist in small quantities on almost all propagation benches, drift through the air, and arrive on seed hulls. They remain harmless until two conditions align: free surface moisture and poor air movement. When the surface of a seed tray stays wet for longer than forty-eight hours, these water molds germinate, producing motile zoospores that swim through thin films of water toward stem tissue.
A soaked surface also seals the top of the plug, cutting off gas exchange. Roots consume oxygen and exhale carbon dioxide; when the pores at the top of the cell are flooded, that gas exchange stops. The plant weakens, cellular walls become limp, and root cells begin to leak sugars and amino acids into the substrate. These exudates serve as an immediate chemical beacon for fungal spores waiting at the surface.
By keeping the upper few millimeters of the medium visibly lighter in color and crumbly to the touch, we create a barrier that spore tubes cannot cross. The fungus cannot survive on dry peat or perlite fibers under bright grow lights. We often add a thin top-dressing of coarse horticultural vermiculite or washed river grit across the tray after sowing. This inorganic barrier dries within twenty minutes of bottom-watering, ensuring the seed collar rests against dry mineral surfaces while its radicle drives down into moist, aerated compost below.
Building a Passive Drainage Station for Wet Trays
Lifting a tray out of the water pan is only half the work. If we set a dripping flat straight onto a solid wooden bench or plastic sheeting, surface tension holds water across the drainage holes, trapping a perched water table inside each cell. We must break that surface tension immediately by providing a dedicated drainage rack where gravity can pull excess liquid out through the bottom vents.
We construct our drainage station using a wire cooling grid or heavy plastic nursery mesh supported on two parallel wooden battens. The battens hold the bottom of the tray twenty-five millimeters above the table surface, allowing air to circulate freely beneath the drainage ports. When the wet tray is set down on this grid, the water droplets clinging to the plastic base bridge across the wire and fall away cleanly into a drip pan below.
Leave the tray on this drainage station for eight to ten minutes before returning it to its regular shelf or heat mat. If you notice a particular cell holding water, a light downward tap of the flat against the wire rack breaks the meniscus and drops the pooled water instantly. This short drying interval restores the air capacity of the lower plug, bringing twenty percent of the cell volume back to air space before the roots suffer from low oxygen.
Recognizing When Seedlings Need Another Drink
We avoid watering on a rigid calendar schedule. A sunny day with low humidity may dry a flat in twenty-four hours, while three days of damp, overcast weather can keep a plug moist for nearly a week. Instead, we rely on weight, color, and touch to read the hydration level of the tray.
- The balance check: Pick up the tray with two hands. A dry seventy-two cell flat feels light, almost like empty plastic, weighing roughly four hundred grams. A fully saturated flat feels solid and heavy, tipping the scale around twelve hundred grams. We water when the tray reaches approximately one-third of that maximum heft.
- The color gradient: Peat-based media turn from a dark, rich coffee color when wet to a dusty, pale cocoa hue when dry. We look for a visible transition where the top five millimeters have lightened, while the compost visible through the bottom drainage holes remains dark.
- The finger resistance: Press a clean index finger three millimeters into the corner of an empty edge cell. If the mix yields like dry velvet, moisture is low. If it leaves wet, glistening mud on your skin, do not add water.
- The stem posture: Watch the foliage closely. Seedlings nearing thirst lose their bright leaf sheen and take on a dull, slightly grayish-green tint hours before they actually wilt. We aim to water at this subtle visual shift, never waiting for stems to buckle.
For growers managing dozens of trays under lights, a small kitchen scale kept next to the propagation bench eliminates guesswork. Weigh your tray when you first finish packing and watering it, write that saturated weight on the plastic rim with an grease pencil, and record the dry weight when the first true leaves emerge. Within a week, your hands will memorize the difference without needing the scale at all.
Common Bottom-Watering Mistakes to Avoid
The most frequent error we see is treating the watering basin as permanent storage. Leaving seed trays sitting in shallow water for hours or overnight turns the entire bottom third of the root system into a black, oxygen-starved sludge. Capillary action is swift; once the medium has drawn what it needs, any further immersion causes root hair death.
Another misstep is failing to wash the immersion tub between batches. If a tray of brassicas suffers from damping-off and you reuse that same bath water or tray for a flat of sweet peas, you transport fungal oospores directly into the drainage holes of the clean flat. Scrub your soak basins with a stiff bristle brush and warm soapy water between runs, rinsing them thoroughly before introducing clean trays.
Finally, avoid bottom-watering when the soil has shrunk away from the cell walls due to severe dehydration. When peat dries out completely, it becomes hydrophobic, shrinking into a hard plug. If you place a shrunken flat into a water pan, water does not rise through capillary pores; instead, it shoots up the narrow gap between the dry soil and the plastic wall, flooding the top while leaving the center of the root ball completely dry. If plugs have dried to this state, a light misting from above with a fine fogger nozzle is required first to break the hydrophobic seal before bottom immersion will work.
Putting the Routine into Practice on Your Bench
Begin your next sowing run by preparing your station before you even open a seed packet. Set your water reservoir, your elevated drainage rack, and your dry catching towels in an orderly line along the bench so the physical workflow moves smoothly from left to right. Select cell trays with clean, unobstructed drainage holes, checking each corner cell where plastic molds sometimes leave flash covering the openings.
Keep a clean pencil or marker at hand to note the date of sowing and the date of the first bottom soak on the tray rim. For persistent fungal problems in older greenhouses or damp basements where ventilation is poor, consider having your water supply tested for fungal contaminants, or consult a local agricultural extension specialist to review your environmental humidity levels. With clean tubs, measured soak times, and a dedicated drainage rack, your seedlings will produce stocky, bright white roots that easily hold their plugs together on transplanting day.
Our field notes serve general horticultural education; consult your local agricultural extension service for regional biosecurity rules and persistent plant pathology. Disclaimer

Complementary Reading
-
 Seedcraft & Propagation 9 min read
Pricking Out and Potting Up Tender Tomato Seedlings
You will discover how to read true-leaf development and separate crowded sprouts without bruising main stems. Handling plants strictly by their cotyledons allows you to bury leggy growth and build thick root balls.
-
 Seedcraft & Propagation 10 min read
Cold Stratification Checklist for Perennial Berry Seeds
You will discover how to recreate winter soil conditions inside your kitchen refrigerator using coarse sand. Breaking seed dormancy deliberately ensures high, uniform germination across wild alpine strawberries and brambles.