 Tyne Seedling
You will master bare-root cane spacing, root-spread technique, and wire trellising in timber raised planters. Sound support lines and moisture-retentive mulches shield shallow feeder roots from summer heat.
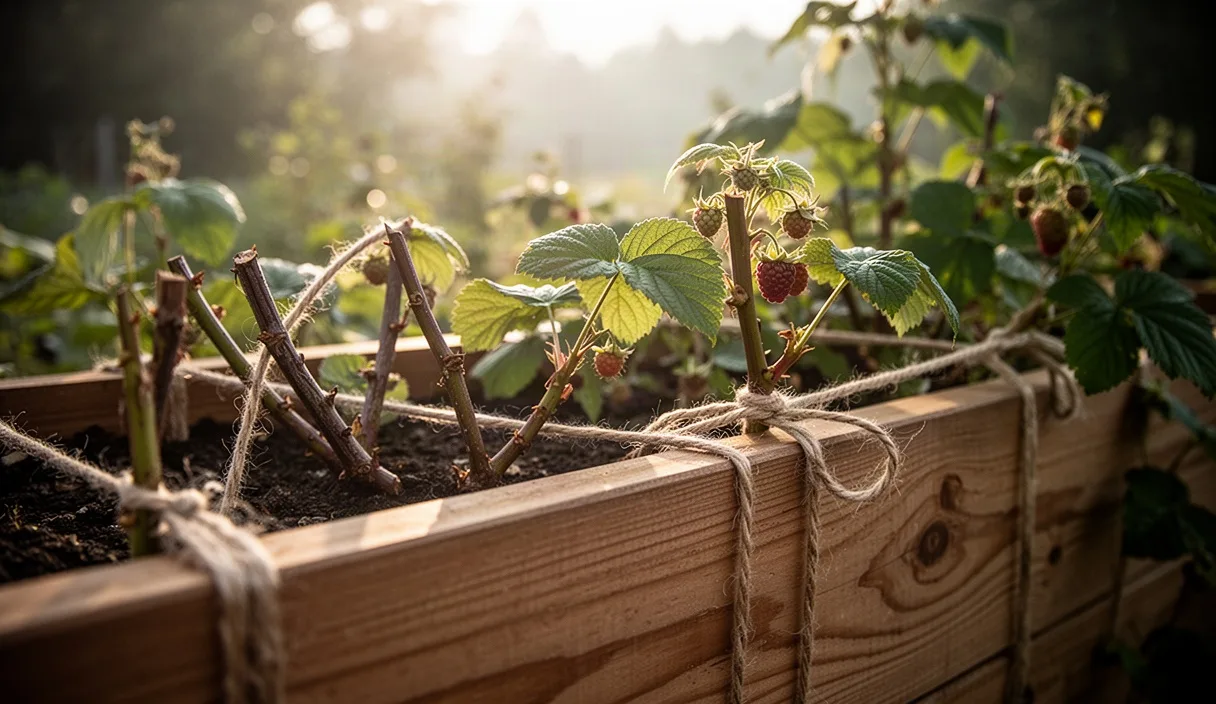
- Soak bare-root cane bundles in cold water for two hours before planting to rehydrate dry root hairs.
- Spread root strands flat across shallow mounds rather than cramming them into narrow holes.
- Prune newly set canes down to twenty centimeters to force vigorous new growth from the base.
When we assemble a narrow raised bed for fruit canes, we are choosing precision over sprawl. In native ground, raspberries send out traveling suckers that quickly wander across paths and tangle with nearby crops. Confining them to a timber box measuring 45 to 60 centimeters wide lets us curate the growing medium, control drainage, and establish a permanent framework that supports years of fruiting wood. There is an honest satisfaction in running our fingers through friable, compost-rich soil inside a cedar or larch trough, knowing the roots will settle into loose, warm earth weeks before the cold clay paths beside them even thaw.
Working with bare-root stock in early spring or late autumn asks us to pay close attention to material and seasonal timing. The canes arrive as dormant, weathered sticks tied in bundles, their fibrous roots packed in damp wood shavings or peat. Handling them requires deliberate steps: building a frame that withstands prevailing winds, rehydrating desiccated root fibers, laying the stock at the exact depth required, and weighting the soil with our boot soles to seat the crowns. We approach the work methodically, piece by piece, from the tension of the wire to the depth of the straw mulch.
Selecting Between Summer-Fruiting and Autumn Canes
Before we turn a single spade of soil, we must choose which fruiting habit matches our bed and our kitchen plans. Summer-fruiting types, or floricanes, bear fruit on biennial wood. They spend their first year pushing tall, green vegetative canes that survive the winter and produce berries during the subsequent midsummer. Autumn-fruiting varieties, or primocanes, fruit at the tips of new canes grown in that very same season, offering fruit from late August until the hard frosts of October or November. Because their pruning habits and wire needs differ, mixing both forms in a single narrow run often leads to pruning confusion.
In narrow raised beds, autumn primocanes offer a mechanical advantage: simplicity. At the close of winter, we can shear all old canes flush to the soil line with sharp loppers, clearing the box completely for a clean spring dressing of compost. Summer floricanes require us to untie and cut out only the spent, woody brown canes while gingerly preserving and retraining the tender young green shoots against our wires. For growers who desire a prolonged harvest, dividing a bed into distinct, separate compartments or dedicating individual timber boxes to each type keeps the maintenance orderly.
| Characteristic | Summer-Fruiting (Floricane) | Autumn-Fruiting (Primocane) |
|---|---|---|
| Bearing Wood | Second-year brown canes | First-year green canes |
| Harvest Window | Late June through July | Late August to first freeze |
| Support System Needed | Robust three-wire trellis | Basic two-wire containment line |
| Annual Pruning | Selective removal of spent canes | Complete cut-down to soil level |
| Common Varieties | Glen Ample, Tulameen, Malling Jewel | Autumn Bliss, Polka, Joan J |
When we source our stock, we look for certified virus-free canes with thick, pliant root systems and undamaged crowns. Canes with split barks, grey mould patches, or brittle, snapped main buds should be rejected or trimmed back. Taking time to inspect each stem as it comes out of the bundle guarantees that our bed starts with vigorous, clean wood.
Building Sturdy Timber End-Posts and High-Tensile Wires
A narrow bed filled with leafed-out canes catches wind like a canvas sail. If we merely push light bamboo stakes into the compost, an autumn gale will lever the roots back and forth, tearing the delicate root hairs that feed the fruit. We construct our trellis system directly into the structural frame of the bed, anchoring thick posts that can carry the load of rain-soaked foliage and heavy summer yields without flexing.
We prefer using 75-millimeter by 75-millimeter square posts made from rough-sawn, pressure-treated softwood or untreated sweet chestnut. We bolt these posts securely to the inside corners of the timber bed, sinking them at least 45 centimeters into the native earth beneath the bed floor whenever possible. If the bed sits on hard rock or concrete, we use heavy galvanized coach bolts to lash the vertical posts through the bed sides, bracing the end-posts with an angled diagonal timber strut set at a 45-degree angle. This knee-brace prevents the top of the post from bowing inward under wire tension.
- Select high-tensile wire: Use 2.5-millimeter galvanized steel wire or plastic-coated vineyard wire. Light garden twine stretches and rots within a single season.
- Fix heavy anchor hardware: Screw heavy-duty galvanized eye-bolts into the end posts. We drill pilot holes through the center of the post to prevent the grain from splitting.
- Incorporate barrel strainers: Thread an inline wire strainer or turnbuckle onto each line so you can tighten the wire when summer heat and crop weight cause slight slackening.
- Set wire heights: For floricanes, position the bottom wire at 60 centimeters, the middle at 110 centimeters, and the top run at 160 centimeters above the bed soil. Primocanes function well with two lines set at 75 centimeters and 120 centimeters.
Running a cross-arm, often called a T-bar, at the top of the post allows us to string two parallel wires running down the bed rather than a single center line. This creates a supportive channel 30 centimeters wide. We simply drop the rising canes between these parallel wires, cutting down the hours spent hand-tying individual stems with jute twine.
Root Prep: Hydration and Damaged Root Removal
Bare-root raspberry canes travel a long way from the nursery field, and their exposed roots are vulnerable to drying winds. The moment we open the paper packaging, we check the moisture level of the packing moss. Even if the material feels cool, we place the canes into a galvanized bucket filled with clean, room-temperature rainwater. We keep the crown and stems out of the water, soaking only the lower root mass for two to three hours. Leaving roots submerged for longer than five hours can starve the cells of oxygen, so we time our hydration carefully.
Once hydrated, we lift each cane out of the bucket and rest it across a wooden board for inspection. Bare-root systems consist of a central taproot or old cane heel surrounded by a network of finer, hair-like feeder roots. We pick up our sharp bypass secateurs, wipe the blades with methylated spirits, and examine every inch of the root system. We prune away any roots that are black, mushy, or stripped to a stringy core. Clean, angled cuts made into healthy root tissue stimulate the plant to produce fresh calluses and young feeding roots once buried.
We also trim back exceptionally long, circling roots that would have to be bent or curled to fit within our narrow bed dimensions. A straight root shortened to 15 centimeters will establish far more rapidly than a 30-centimeter root curled like a pig's tail in the planting hole. We preserve as much of the fine, tan-colored root fleece as possible, keeping the root bundle covered with damp hessian sacking as we carry it to the garden.
Digging Shallow Trenches and Spacing Canes Correctly
Raspberries are woodland-edge plants that naturally root in rich leaf litter near the surface. Sinking them into deep, airless holes is a reliable way to kill the crown. In a narrow raised bed, we do not dig individual circular pockets; instead, we excavate a continuous, flat-bottomed trench down the center line of the bed. We use a square-ended trenching spade, slicing the compost mix to a consistent depth of 8 to 10 centimeters.
The base of our trench must be level and slightly loosened with a hand fork. We blend a generous scattering of well-rotted leaf mould or aged garden compost into the floor of the trench, along with a modest dressing of bone meal or rock phosphate to encourage early root development. We avoid hot, nitrogen-heavy manures at this point, as direct contact with high-salt fertilizers burns bare root tips.
- Calculate spacing along the bed: In a bed 45 to 60 centimeters wide, we plant in a single central row. Set canes 35 to 45 centimeters apart. If the bed is 90 centimeters wide, you can plant a staggered double row with 45 centimeters between plants.
- Splay the roots outward: Place each cane into the trench, spreading its root system out horizontally across the soil floor like the spokes of an open umbrella. Never bunch the roots into a downward fist.
- Verify the soil mark: Locate the old soil line on the woody base of the cane, which looks like a distinct color change from dark earth to weathered bark. Set the cane so this mark sits level with, or no more than 2 centimeters below, the finished bed surface.
- Backfill with crumbly topsoil: Pull the reserved soil back into the trench with your hands, sifting it between the roots to prevent large clumps from creating voids beneath the crown.
Firming Soil Gently with Boots to Expel Air Pockets
Loose soil holds too much trapped air, which dries out fragile feeder roots before they can draw moisture from the soil particles. Once the trench is backfilled to the level of the bed, we must compress the soil around the canes. This step requires a careful touch: we need firm soil contact, but we must avoid compacting the bed into a solid, unyielding brick that suffocates life.
We stand over the trench and use the heel and sole of our work boots to tread the ground along both sides of each cane. We step methodically, placing our body weight directly onto the soil 5 centimeters away from the central stem, pressing downward with a measured heel-to-toe stride. You should feel the soft compost compress by 2 to 3 centimeters, settling firmly around the hidden root spread. If the cane rocks back and forth when touched, the ground needs further firming.
After treading the run, we check each cane by giving it a gentle upward tug with two fingers. A correctly firmed cane stays put against moderate resistance. If it slides out of the soil with little effort, reset the plant and press the soil again. Once the entire row passes this test, we water the bed thoroughly using a watering can fitted with a fine rose. We deliver roughly 10 liters of water per linear meter of bed. The water carries fine silt into any remaining hidden voids, bedding every microscopic root hair directly against moist soil.
The Initial Heading Cut and Straw Mulching Layer
Planting the cane is only half the work; we must also direct the plant's stored sap where it is needed most. When bare-root canes arrive, they often measure 60 to 90 centimeters in length. Leaving this tall, dead-looking stick intact encourages the plant to break top buds and produce leaves before it has grown enough roots to support them. The top-heavy cane also acts as a lever in the wind, loosening its own root grip.
We take our bypass shears and make a clean, sloping cut across each cane, leaving a stub only 15 to 20 centimeters tall above the soil surface. We make the cut 5 millimeters above a healthy, outward-pointing bud, angling the cut away from the bud so rainwater runs off rather than pooling on the dormant eye. This decisive cut forces the root energy downward into anchor production and encourages vigorous new shoots, known as spawns, to emerge directly from the crown beneath the soil surface. Autumn-fruiting canes can even be cut down completely flush with the ground line, though leaving a short 10-centimeter marker stub helps remind us where the crowns are situated until spring growth emerges.
Finally, we blanket the exposed bed surface with a thick, clean mulch layer. We prefer clean barley straw, seed-free meadow hay, or coarsely shredded bark. We spread this material across the entire width of the narrow bed to a settled depth of 7 to 8 centimeters. This insulating layer performs several quiet duties:
- It buffers the root zone against temperature swings during early spring frosts.
- It conserves soil moisture by halting evaporation caused by drying winds.
- It prevents annual weed seeds from germinating in our clear compost.
- It stops heavy rain droplets from churning and crusting the soil surface.
When applying the straw, keep it pulled back roughly 3 centimeters from the canes themselves. Piling damp mulch directly against the bark traps stagnant moisture, inviting fungal cankers and collar rot during warm spells.
Common Mistakes to Avoid
When working within the tight boundaries of narrow raised beds, small errors in technique are amplified. We frequently encounter these recurring issues in cane beds:
- Planting too deep: Burying the crown 10 centimeters beneath the surface leads to crown suffocation and weak, delayed shoot emergence. The root plate belongs just below the soil line.
- Using rich, raw manure in the planting trench: Uncomposted manures generate excessive heat and contain high levels of salts that scorch fragile bare roots. Use mature, sweet-smelling leaf mould or finished compost instead.
- Ignoring wire tension before planting: It is frustrating to drill posts and pull wires through a bed already filled with canes. Always build, brace, and tension your trellis framework before digging your planting trench.
- Failing to head back the canes: Out of a desire for early fruit, growers leave long nursery canes unpruned. These canes produce a few small, dry berries, exhaust the crown, and fail to send up strong new wood for the next year.
- Allowing beds to dry out unevenly: Timber raised beds drain rapidly and shed water at their outer edges. Ensure the central trench receives thorough, deep soakings rather than brief surface sprinkles.
Practical Next Steps for the Planting Bed
With our bare-root canes pruned and the straw laid down, the active planting phase is complete. Now begins the quiet period of observation and care as spring awakens the root systems. Our primary task over the coming six weeks is monitoring the moisture beneath the straw. We slide a hand under the mulch once a week; if the soil feels cool and damp to the touch, we leave it alone. If it feels dusty or warm, we apply water gently along the base of the stems.
As daytime temperatures approach 12 to 15 degrees Celsius, keep a sharp eye on the soil line around the stubs. You will soon notice fat, reddish-green shoots breaking through the surface. Once these shoots reach 20 centimeters in height, summer floricane stubs can be trimmed away completely to the ground if they show signs of blight, passing all energy to the vibrant new wood. For structural security, walk the line of your end posts after the first heavy spring rainfall, checking that the wires remain taut and the timber supports stand true and straight.
Our field notes serve general horticultural education; consult your local agricultural extension service for regional biosecurity rules and persistent plant pathology. Disclaimer

Complementary Reading
-
 Orchard & Cane Fruit 10 min read
How to Hard-Prune Redcurrant Bushes for Heavy Fruiting
You will learn how to carve an open goblet framework in your redcurrant bushes while the wood rests dormant. Removing old dark branches directs springtime sap straight into short, heavy fruiting spurs.