 Tyne Seedling
You will learn how to carve an open goblet framework in your redcurrant bushes while the wood rests dormant. Removing old dark branches directs springtime sap straight into short, heavy fruiting spurs.
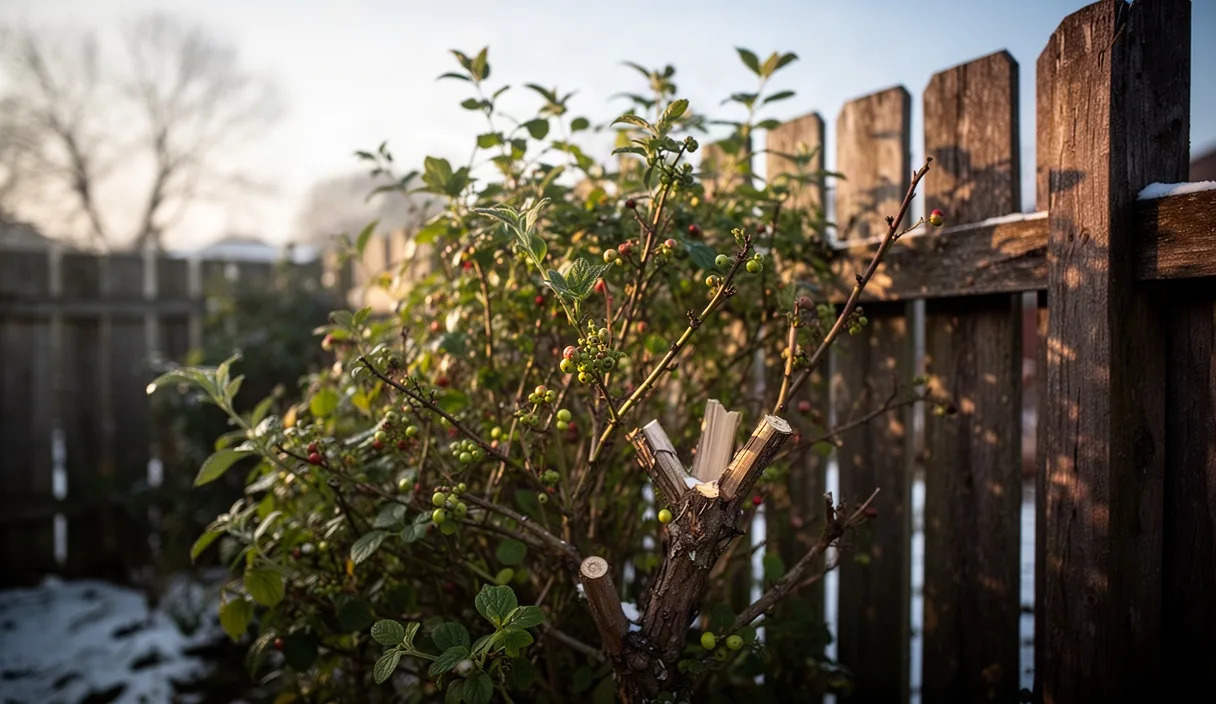
- Cut out three-year-old dark wood at soil level to stimulate fresh basal canes each spring.
- Shorten new annual branch extensions by one third to an outward-facing bud to preserve shape.
- Prune side shoots back to two active buds to build compact fruiting clusters along main stems.
When the January freeze locks the damp soil around the garden beds, we head to the redcurrant rows with leather gloves and a whetstone. The bushes stand dormant, an intricate tangle of smooth buff rods and rough, charcoal-tinted branches. Left to their own devices, redcurrants (Ribes rubrum) will crowd themselves into a dense thicket of weak twigs, yielding small, scattered fruit that rots before sunlight ever reaches it. Winter hard-pruning strips that chaos away, establishing an orderly architecture where every single bud receives air and light.
Unlike blackcurrants, which carry their finest crop on young wood made the previous summer, redcurrants fruit primarily on small spurs that sit upon two-year-old and three-year-old framework stems. To get heavy, pendulous trusses that pick cleanly in July, our cuts must balance renewal growth with spur formation. It is slow, deliberate craft work. By understanding the grain, the age of the wood, and the direction of dormant nodes, we guide the energy of the plant into sturdy scaffolds built to hold pounds of glistening, acid-sweet berries.
Identifying One-Year, Two-Year, and Three-Year Wood
Before we place a steel blade against a branch, we spend time reading the wood. Each growing season leaves clear physical records on the bark: distinct shifts in color, skin texture, and bud clustering. Tracing a cane from tip to soil allows us to identify the age bands that dictate where fruit will actually emerge.
One-year-old wood represents the extension growth from the previous spring and summer. It is smooth, pale tan or warm straw-colored, and shows no peeling or lichens. The buds along this wood sit flat against the bark, spaced several inches apart, pointing single tips upward toward the sky. While these rods can carry a light fringe of fruit, their main duty is to serve as extensions or replacements for the permanent framework.
Two-year-old wood shifts in tone toward an ash gray or dull brown. The bark here begins to display fine vertical fissures, and the buds no longer lie flat. Instead, they produce short, wrinkled clusters known as fruit spurs: tight groups of round, plump flower buds resting on thick wooden bases. This is the prime fruiting timber of the bush. Three-year-old and older wood darkens further, taking on a weathered, rough exterior often coated in silvery skin or flecks of moss. While three-year-old wood still bears fruit spurs, four-year-old timber declines in vigor, producing weak side shoots and tiny, uneven berries.
| Wood Age | Bark Appearance | Bud Formation | Function in the Bush |
|---|---|---|---|
| One-year | Smooth, pale buff or straw tan; clean surface | Single, flat buds pointed upward at wide intervals | Extension of structural ribs; future scaffold material |
| Two-year | Dull brown to soft gray; fine vertical micro-cracks | Fat spur clusters grouped close against the stem | Heaviest fruiting zone; produces large, uniform strigs |
| Three-year | Rough, charcoal gray; peeling outer membrane | Aged, knobby spur assemblies with secondary shoots | Secondary fruiting; requires selective thinning |
| Four-year and older | Dark, cracked, brittle; covered in lichens | Sparse, exhausted spurs; weak spindly growth | Unproductive bulk; scheduled for removal at base |
Sanitizing and Sharpening Bypass Secateurs
Clean cuts require razor-sharp steel. We never reach for anvil pruners when tending soft fruits, because their crushing action bruises the stem bark and tears the cambium layer, inviting botrytis and coral spot fungus. We use high-carbon bypass secateurs where a thin, curved blade sweeps past a thick counter-blade. A pair of narrow-bladed fruit-thinning snips is also helpful for teasing out tight spurs without marring neighboring wood.
We prepare the cutting edge using an oilstone or a medium-fine diamond file. Work only on the beveled edge of the cutting blade, matching the factory angle of roughly 20 degrees. We push the stone smoothly across the curve in firm, sweeping strokes from the heel of the blade to the tip. We never drag the stone backward, and we do not grind the flat backside of the blade, save for a single light pass to clear any burr created by the sharpening process. A properly dressed edge will slice through scrap printer paper cleanly, with no snag or hesitation.
Sanitizing prevents the transfer of pathogens between plants. We clean the tool before we touch the first bush, and we wipe the blades down between every individual specimen in the orchard row. A rag soaked in isopropyl alcohol (70 percent solution) or straight methylated spirits strips away dried sap, lichen spores, and bacteria. If you notice any sudden dieback or dark staining inside the pith of a cane, clean the tool immediately before making another cut.
Opening the Bush Center for Sun and Air Flow
The traditional open goblet or wineglass form is the gold standard for redcurrant architecture. Our aim is to develop a bush with an open, hollow center supported by eight to ten strong framework branches that radiate outward from a short central leg. This configuration prevents stagnant, humid air from lingering among the leaves, which significantly reduces the risk of powdery mildew and leaf spot during wet spring weather.
We begin the pruning process by dropping our gaze to the base of the plant, removing the three classic troublemakers: dead, diseased, and damaged timber. Cut dead wood right back to sound, green tissue or directly to the basal stool. Next, we address shoots that cross through the interior void. Any branch growing inward toward the center of the bush must be removed completely at its point of origin. When two canes rub together in the wind, the friction wears away the protective bark, creating open wounds; remove the weaker of the two crossing branches.
To keep the goblet open, we also cut away low, sagging branches that grow within four to six inches of the ground. These trailing canes become heavy with foliage and fruit later in the season, pulling the berries down into the dirt where soil-dwelling fungi and splashing rain ruin the crop. When you step back after this initial clearing pass, you should be able to look straight down through the center of the bush to the crown soil.
- Clear any suckers rising directly from the underground roots outside the main crown ring.
- Remove four-year-old dark framework branches by sawing them back to a low stub, allowing a fresh one-year cane to take their place.
- Thin the main structural branches so that each primary stem stands roughly six to eight inches apart from its neighbor at shoulder height.
Shortening Leading Shoots to Outward Buds
Once the central clutter has been cleared, our attention moves to the leading shoots. These are the vigorous, pale one-year-old stems that sit at the top of each primary framework branch, extending the height and spread of the bush. If left untrimmed, these leaders draw sap directly to their uppermost tips, growing tall, whippy, and prone to breaking in summer storms while leaving the lower stem bare of productive spurs.
We shorten each leader by roughly one-third to one-half of the growth made during the previous season. If a leader has put on eighteen inches of growth, we cut back six to nine inches. On a mature bush that has reached its desired working height (usually three to four feet tall), we can prune the leaders back even harder, leaving only two or three buds of the current year's growth to keep the bush within easy reach.
The placement and angle of this cut are critical. We select an outward-facing bud, one that points away from the center of the plant. Making the cut here ensures that the new branch emerging in spring will continue to expand the goblet outward rather than crowding the interior. Position the sharp bypass blade about a quarter of an inch above the bud, sloping downward at a slight angle away from the bud. A cut made too close can dry out and kill the bud node, while a long, ragged stub above the bud will wither, decay, and provide an entry point for wood-boring pests.
Spur Pruning Side Growth for Dense Fruit Clusters
Spur pruning is the engine room of redcurrant production. The main structural stems produce dozens of lateral shoots along their sides every summer. If left intact, these side branches become a tangled brush of secondary shoots. By pruning them back hard during winter dormancy, we force the base of each lateral shoot to transform into a permanent fruiting spur packed with flower buds.
We treat lateral shoots systematically, working from the bottom of each structural branch up to the base of the newly shortened leader shoot:
- Inspect the lateral shoot to confirm it grew during the past summer. These shoots will display that bright, smooth straw bark.
- Count the buds along the lateral shoot starting from its junction with the main stem. Locate the first or second prominent, healthy bud.
- Place your shears roughly a quarter-inch beyond that second bud and snip cleanly. This leaves a short wooden peg, or spur, measuring between one and two inches long.
- If a lateral is particularly thin, spindly, or weaker than a matchstick, cut it flush back to the main stem collar rather than leaving a spur, as it lacks the energy to support fruit.
- Examine existing spurs on two-year and three-year wood. If an old spur has branched repeatedly into a congested cluster, thin it by removing the weakest sub-spurs, leaving two or three strong nodes.
In spring, the sap will push into these shortened stubs. Instead of fueling long leaves and leafy extension stems, the energy is concentrated directly into the remaining nodes. These buds will open into compact flower racemes (strigs) that cascade down the main framework branches in tight, easy-to-harvest ropes of fruit.
Mulching the Crown Post-Pruning with Rotted Straw
With the clippings raked away and the framework pruned into balance, the final task belongs to the root zone. Redcurrants have shallow, fibrous roots that spread widely within the top few inches of the soil. They are exceptionally sensitive to summer drought, which causes premature berry drop, and they struggle in compacted ground stripped of biological life.
We dress the soil under each bush with a generous blanket of well-rotted straw, conditioned pasture bedding, or composted wood chip. Fresh, dry yellow straw straight from an agricultural bale can rob available nitrogen from surface soils as it breaks down, so we choose straw that has weathered for at least six to nine months, showing a dull gray-brown cast and a damp, earthy smell. This material breaks down steadily, feeding worms and soil microbes while knitting together into a cool, moisture-retentive pad.
Spread the rotted straw evenly across the root zone to a depth of roughly three inches, extending outward to the drip line of the bush branches. Crucially, we keep the mulch pulled back three to four inches away from the actual central wooden stems. Piling mulch against the living bark creates an overly wet, humid collar that encourages basal rot and invites field mice or voles to chew on the stem bark under cover of the straw during deep winter.
Common Mistakes to Avoid
Pruning redcurrants requires a very different approach than pruning blackcurrants, and treating them identically is the most frequent error we encounter. Blackcurrants need older wood stripped away to make room for long new shoots; redcurrants need stable older wood preserved so spurs can mature. Keeping the following pitfalls in mind will protect your plants:
- Pruning out all two-year wood: Cutting the bush completely to the ground, as is sometimes done with blackcurrants, discards your primary fruiting spurs and leaves you with zero crop for the coming summer.
- Leaving ragged branch stubs: When taking out larger limbs, leaving a two-inch dead peg invites rot right into the heart of the central stem. Always cut neatly back to the branch bark collar.
- Neglecting interior clearance: Failing to remove inward-facing shoots leaves the center dark, promoting fungal issues like gooseberry mildew and making fruit picking difficult.
- Inconsistent leader reduction: Leaving one primary branch unpruned while cutting its neighbors short will divert the plant's apical dominance, resulting in a lopsided, structurally unstable bush.
Practical Next Steps
Once your bushes are pruned and the crown is mulched, bundle the pruned dormant wood. If you wish to expand your patch, straight, healthy one-year leader cuttings measuring eight to ten inches long make excellent hardwood cuttings. Trim the base just below a node, insert them two-thirds deep into a sandy nursery trench or deep pots, and leave them to take root over the coming year.
In late winter, before the buds crack open to reveal green tips, inspect the branches for signs of clearwing borer damage or swollen, rounded buds that could indicate big bud mite infestation. Remove and burn any swollen, deformed buds. If your orchard has experienced severe, repeated infestations or persistent bacterial dieback in prior seasons, consider consulting a certified regional horticulturist or agricultural extension agent to identify specific biological remedies before applying any dormant oil or sulfur sprays. Keep the straw mulch undisturbed until spring warmth arrives, allowing the roots to rest in steady, damp earth as they gather strength for the coming flowering.
Our field notes serve general horticultural education; consult your local agricultural extension service for regional biosecurity rules and persistent plant pathology. Disclaimer

Complementary Reading
-
 Orchard & Cane Fruit 11 min read
Planting Raspberry Canes in Narrow Raised Beds
You will master bare-root cane spacing, root-spread technique, and wire trellising in timber raised planters. Sound support lines and moisture-retentive mulches shield shallow feeder roots from summer heat.